Removing paint from a wood deck can be a challenging task, especially if you are an amateur. Whether you’re dealing with peeling paint or staining the wood deck knowing the right techniques can make all the difference when removing paint from your wood deck.
Thus, in this blog, we will guide you through a step-by-step process on how to remove paint from the wood deck, ensuring you get a clean, smooth surface that is ready for whatever comes next.
Six-Step Comprehensive Guide To Remove Paint From The Wood Deck
1. Collect All Materials

So, first of all, start gathering all materials required to remove paint from the wood deck. The list includes the following items as listed below:
- Personal protective equipment (PPE)
- Paint roller/brush
- Sprayer
- Scraper
- Powerwasher
- Vacuum cleaner/broom
- Sander (random orbital or belt sander)
- Nylon-bristle brush
- Paint stripper
- Sandpaper
- A suitable finish
2. Prepare The Area
The next step is to prepare the area. Preparing your wood deck before removing paint is crucial for ensuring a clean, smooth surface and effective paint removal. Moreover, it helps prevent damage to the wood and makes sure that the new finish adheres properly.
So, use a vacuum cleaner or a broom to remove any loose debris, leaves, or dirt from the deck’s surface. Next, inspect the deck for any damaged boards, splinters, or rot. If you come across any, get them fixed.
3. Apply Paint Stripper
The third step is to apply the paint stripper. Select a paint stripper specifically designed for wood decks, considering factors like the type of paint you’re removing (oil-based or latex) and the condition of the wood.
Now, apply the stripper to the deck using a paintbrush, working in the direction of the wood grain. Once done, allow the stripper to sit on the paint for the recommended time according to the product’s instructions (which usually takes 20-30 minutes). This will give the stripper ample time to penetrate the paint and loosen it from the wood.
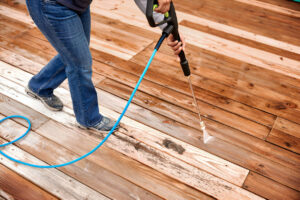
4. Remove The Paint
Once the wait is over, it’s time to remove the softened paint and stripper residue using a pressure washer.
After that, connect the pressure washer to a water source and power outlet. Adjust the pressure settings according to the manufacturer’s instructions and the condition of your wood deck.
As everything is ready, begin pressure washing the deck, starting from the bottom and working your way up. Use a sweeping motion to remove the paint stripper, softened paint, and any remaining residue. If you have a surface cleaner attachment, use it to clean larger areas more efficiently.
In addition to the pressure washer, you can also use scrapers or nylon-bristled brushes to manually remove the paint and the stripper. But bear in mind that it can be more time and labour-consuming.
5. Clean And Rinse The Deck
Paint strippers often leave behind a residue that can interfere with the adhesion of any new finish. If left on the deck, this residue can cause the new finish to peel or blister, so the fifth step is to clean and rinse the deck. Follow the steps to learn how.
- In a bucket, mix a mild detergent or wood cleaner with water according to the product instructions and apply it to the deck using a brush or sprayer.
- Next, scrub the deck with a stiff-bristled brush to remove any remaining residue, paying extra attention to areas where the paint stripper may have been concentrated.
- After that, rinse the deck thoroughly with clean water to remove all traces of the cleaning solution and any remaining residue. Use a hose or pressure washer to ensure complete rinsing.
6. Sand And Refinish

As the deck dries, sand and refinish it in order to restore its natural beauty and protect it from the external elements. Choose the right sanding equipment and begin with a coarser grit sandpaper (e.g., 80-grit) to remove any remaining paint residue or uneven surfaces.
Then, gradually move to finer grits (e.g., 120-grit, then 180-grit) to smooth the wood. While sanding, always sand with the grain of the wood to avoid creating scratches, and divide the deck into smaller sections to make the sanding process more manageable.
Once the sanding part is done, use a broom to remove any sanding dust from the deck’s surface. Finally, following the manufacturer’s instructions, apply a suitable finish using a brush or roller.
Final Thoughts!
A well-maintained wood deck adds beauty and value to any home, but old or peeling paint can detract from its natural charm. Thus, to restore the wood to its original state, it is essential to remove the paint from the wood deck the right way and restore its natural beauty.
Nonetheless, if you lack the confidence to rejuvenate your wood deck and are worried about ruining the beauty of your outdoor space (as is completely natural), you can always reach out to the professionals at Sanding Wood Floors.
Their team uses top-of-the-line tools and eco-friendly solutions as well as the latest techniques to strip away old paint layers, leaving your wood clean and ready for a new finish.
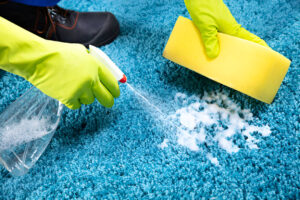
You Can Also Read: Why Does Carpet Stains Keep Coming Back?