Custom Kitchens and Cabinets
You can transform your kitchen into a space that fits how you live, cooks, and entertains without wasting money on features that don’t serve you. Custom cabinets let you choose the exact layout, materials, and finishes that maximize storage, workflow, and long-term value for your home.
This article walks through the design essentials you’ll use to plan layout, door style, and material choices, and it covers practical installation and maintenance considerations so your investment performs for years. Start with clear goals for function and style, and you’ll find decisions about measurements, hardware, and care come into focus quickly.
Custom Kitchens and Cabinets: Design Essentials
Focus on efficient workflow, durable materials, and purpose-built storage when planning custom kitchens and cabinets. Make decisions that align with how you cook, your storage requirements, and the overall visual style you want to achieve in your space.
Planning the Perfect Layout
Place primary work zones—cooking, prepping, cleaning—so you minimize steps between them. Use the work triangle concept: situate the sink, cooktop, and refrigerator within easy reach, ideally forming a triangle no larger than 7–9 metres total perimeter.
Account for clearances: allow 1.2–1.5 m of aisle space for two people to pass comfortably and at least 90 cm in front of ovens and dishwashers for door swing.
Sketch your appliance footprints and door swings before finalising cabinet placements. Include dedicated zones: a breakfast station near the entrance, a heavy-use prep zone with durable counters, and a wet zone with a deep sink and garbage separation. If you entertain, plan open sightlines and an island with seating that keeps traffic out of the main work zone.
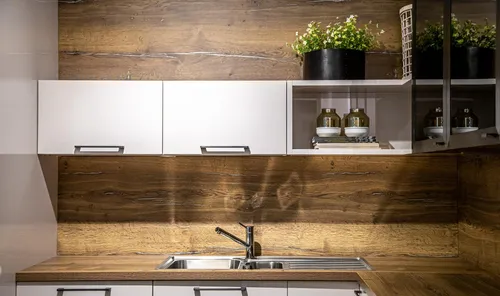
Material and Finish Selection
Choose cabinet carcass materials for durability: plywood or furniture-grade MDF resist moisture and hold fasteners better than particleboard. For visible surfaces, pick finishes based on wear and maintenance: lacquer or thermofoil for low-maintenance, painted or stained solid-wood fronts for longevity and repairability.
Select countertops by use: quartz resists stains and requires no sealing; granite tolerates heat but needs periodic sealing; solid-surface is repairable and seam-minimised for seamless looks.
Match hardware and edge details to function: soft-close hinges and full-extension runners improve usability. Use matte or low-gloss finishes in high-touch areas to hide fingerprints. Test samples in your kitchen light before ordering to confirm colour and texture.
Maximizing Storage and Functionality
Prioritise pull-out solutions where access matters: pull-out pantries, deep-drawer organisers, and blind-corner pull-outs convert dead space into usable storage. Fit drawers for pots and pans rather than lower cabinets with shelves; they improve accessibility and protect backs.
Plan task-specific storage — a tray divider near the oven, a knife block drawer beside the prep zone, and a spice rack adjacent to the cooktop. Use vertical space with tall cabinets and adjustable shelving to adapt over time.
Incorporate integrated recycling and waste bins inside base units to keep counters clear. Add lighting inside drawers and under cabinets for visibility. Label zones mentally: everyday plates and utensils in the most reachable drawers, seasonal items in upper or less-accessible cabinets.
Installation and Maintenance Considerations
Plan for precise fit, reliable hardware, and routine care to keep your cabinets functional and attractive. Expect accurate measurements, level installation, and a maintenance routine that protects finishes and hardware.
Professional Installation Process
Hire a professional who verifies wall plumb, floor level, and stud locations before fastening. They should start with a full-site measurement and a mock-up or template for custom pieces to ensure doors and drawers align properly.
Expect installation steps in this order: removal of old units (if any), wall preparation, upper-cabinet hanging, lower-cabinet placement, countertop fitting, and final adjustments. Request that they shim and scribe cabinets to walls for a seamless reveal and that they secure cabinets to multiple studs for long-term stability.
Confirm the installer uses proper fasteners, soft-close hinges and undermount slides if specified, and applies sealant where cabinets meet backsplashes or countertops. Ask for a punch-list walk-through and written warranty on workmanship and installed hardware.
Caring for Custom Cabinets
Clean surfaces weekly with a soft cloth and a pH-neutral cleaner; avoid abrasive pads and ammonia-based products that strip finishes. Wipe spills immediately—especially oil, wine, and acidic foods—to prevent staining or finish damage.
Tighten hinges and drawer slides every 6–12 months and lubricate metal slides with a dry PTFE spray if they stick. Check seals and caulking around sinks and backsplashes seasonally and re-caulk small gaps to prevent water intrusion.
Protect cabinet exteriors by using cutting boards and trivets; avoid placing hot pans directly on cabinet surfaces. For wood cabinets, control humidity between 35–55% to reduce warping; use a humidifier or dehumidifier as needed.