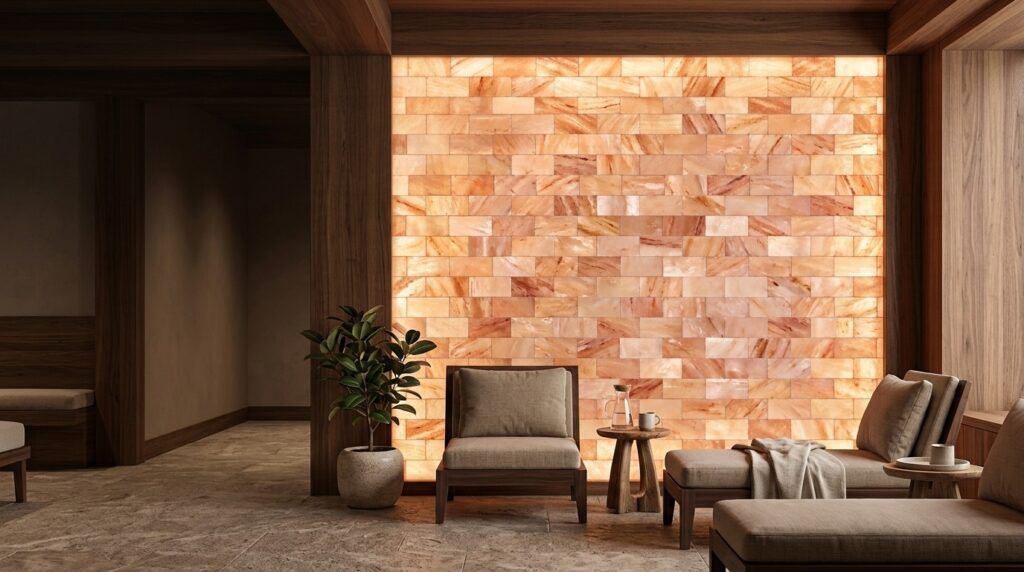
Walk into a spa or sauna with a wall of Himalayan salt tiles lit from behind, and you’ll understand the appeal in about two seconds. The surface looks like it’s breathing light. It’s warm, textured, and completely unlike drywall or tile you’d find anywhere else in the building.
I’ve worked with salt tile installs for spas, home saunas, and retail wellness spaces for years now, and I can tell you the tiles that look great in a showroom photo don’t always survive real-world heat and humidity. This guide covers what actually matters — sourcing, thickness, installation, and how to avoid the mistakes I’ve seen wreck otherwise great projects.
What Are Himalayan Salt Tiles?
Himalayan salt tiles are flat, cut pieces of natural rock salt, mostly sourced from the Khewra Salt Mine in Pakistan — one of the largest and oldest salt mines in the world. Unlike table salt, this rock salt formed over millions of years under intense pressure, which gives it that dense, crystalline structure and the pink-to-orange color range people love.
Tiles are typically cut into standard sizes like 8×4 inches or 12×6 inches, with thicknesses ranging from about half an inch to a full inch. They’re thinner and flatter than salt bricks, which makes them a better fit for smooth accent walls, backsplashes, and ceiling panels.
How Salt Tiles Compare to Bricks and Panels
People mix these terms up constantly, so let’s sort it out:
- Salt tiles — thin, flat, uniform pieces for smooth wall coverage
- Salt bricks — thick, chunky blocks with more texture and depth
- Himalayan salt wall panels — tiles or thin slabs pre-mounted onto a backing board for easier installation
If you want a clean, modern look, tiles usually win. If you want something rustic and dramatic, Pink salt bricks are the better call. Panels are for anyone who wants the tile look without doing individual tile-setting work.
Why Pink Salt Tiles Work So Well for Wellness Spaces
Here’s the thing about salt — it actually prefers dry environments. Saunas, spas, and steam rooms with proper ventilation are low-humidity most of the time, which means the material isn’t fighting its environment the way it would in, say, a bathroom shower stall.
When backlit with LED strips, salt tiles create a soft, warm glow that shifts slightly depending on the tile’s natural mineral veining. No two walls look exactly alike, and that’s part of the draw for interior designers who want something one-of-a-kind for a client.
I’ll be straight with you: claims about salt walls “cleansing the air” or providing therapeutic health benefits don’t hold up well under scrutiny. There’s no solid, independent research confirming meaningful health effects from decorative salt tile walls in a home or commercial space. What they do reliably deliver is atmosphere — and for a spa or wellness brand, that atmosphere is worth real money on its own.
Comparison Table: Salt Tiles vs. Panels vs. Bricks
– $
| Feature | Salt Tiles | Salt Wall Panels | Salt Bricks |
| Thickness | 0.5–1 inch | 0.5–1.5 inches | 2–4 inches |
| Best For | Smooth accent walls, backsplashes, ceilings | Full wall coverage, faster installs | Feature walls, rustic textured builds |
| Install Difficulty | Moderate (adhesive + grout) | Easy (panel mounting system) | Moderate to hard (mortar or frame) |
| Visual Style | Sleek, modern, uniform | Uniform, glowing sheet | Rustic, chunky, natural |
| Typical Lifespan (spa/sauna use) | 6–12 years | 5–10 years | 8–15 years |
| Price Range (per sq ft) | $$ | $ – $$ |
Treat these numbers as a general guide. Actual pricing depends heavily on tile grade, thickness, and where you’re sourcing from.
How to Choose the Right Himalayan Salt Tiles
1. Ask About Salt Grade and Density
Not all rock salt is created equal. Higher-grade tiles are denser, with fewer visible fractures or soft spots. Lower-grade tiles absorb moisture faster and are more prone to crumbling at the edges over time. A good supplier will tell you the grade without hesitation — if they dodge the question, that’s worth noting.
2. Check Tile Thickness for Your Application
Thin tiles (around half an inch) are fine for decorative accent walls with light backlighting. If you’re covering a larger structural wall or an area with more physical contact — like a spa hallway — go with something closer to three-quarters of an inch or more for durability.
3. Match Color Consistency to Your Design Goals
Salt tiles naturally vary in shade, from pale blush pink to deeper amber-red. If you want a uniform look, ask your supplier to hand-select or grade tiles from the same mining batch. If you want a natural, varied look, mixed batches actually work in your favor.
4. Confirm Sourcing and Processing
Reputable Himalayan salt tile suppliers can explain where the salt comes from and how it’s cut and dried before shipping. This isn’t just a nice-to-have — it directly affects tile density and how well the tiles hold up under heat cycling in a sauna or spa environment.
5. Plan Your Lighting Before You Buy
If you want that classic glow effect, decide on LED placement before you order tiles. Some installs use edge-lit LED strips behind the whole wall; others use spot backlighting behind select tiles for a more dramatic, uneven glow. Your tile thickness affects how much light passes through, so thinner tiles glow brighter with less power.
Installation Basics: What Contractors and DIYers Should Know
A typical professional install follows this general sequence:
- Build or confirm a moisture-resistant backing surface, usually cement board or sealed wood, depending on the room.
- Install a mounting grid or mesh backing if the wall will be backlit, so LED strips have room to sit behind the tiles.
- Set tiles with heat-rated adhesive or mechanical clips—standard tile adhesive can break down under sauna or steam room heat over time.
- Grout carefully with a flexible, heat-tolerant grout, leaving small expansion gaps since salt shifts slightly with temperature changes.
- Seal the base and edges to prevent moisture from wicking up from the floor or pooling in a steam room setting.
For a mid-size wall — say 6×8 feet — an experienced two-person team can usually finish in a day, sometimes a day and a half with backlighting involved if you’re a homeowner tackling this yourself, budget extra time for the grout and lighting steps. Rushing those two parts is where most DIY salt walls go wrong.
Maintenance Tips to Keep Salt Tiles Looking Great
Salt tiles hold up well over time, but they’re not maintenance-free.
- Dust or wipe with a barely damp cloth — never soak or scrub with water.
- Keep the room well-ventilated between uses to let residual moisture evaporate.
- Inspect grout lines once or twice a year for early signs of moisture damage.
- Avoid direct water contact, even in steam rooms — condensation dripping directly onto tiles over years can wear down the surface faster than ambient humidity.
Done right, a wall of pink salt tiles can hold its color and structure for a decade or longer without needing a full replacement.
Buying Tips for Distributors, Retailers, and Spa Owners
If you’re sourcing salt tiles at scale — for a spa chain, retail product line, or ongoing contractor business — a few habits will save you money and headaches:
- Order sample tiles before a bulk purchase. Color and density vary by mining lot, so what you see in a catalog photo isn’t guaranteed.
- Ask for a breakage and return policy upfront. Salt is fragile in transit, and even careful packaging results in some loss.
- Request written density or hardness specs, not just weight or dimensions. Two tiles that look identical can perform very differently under repeated heat exposure.
- Work with suppliers who keep consistent stock, especially if you’re running recurring installs or retail sales. One-off importers often can’t match tile batches for repeat orders.
- Compare pricing per square foot, not per tile, since tile sizes vary between suppliers and can make cost comparisons misleading.
Is a Himalayan Salt Tile Wall Worth the Investment?
If you’re building a spa, sauna, or wellness space and want something that actually looks and feels different from every other project out there, Himalayan salt tiles deliver that. It’s not the cheapest wall material on the market, and it’s not going to replace your air filtration system. What it will do is give a room a warm, natural glow and a texture you can’t fake with paint or tile printed to look like stone.
For homeowners, contractors, and designers who’ve seen the finished product in person, that’s usually enough to justify the cost.
4. FAQ Section
Do Himalayan salt tiles dissolve or get damaged by steam? They can be affected by prolonged direct water contact, but well-ventilated saunas and steam rooms with proper sealing rarely cause problems. Avoid direct water splashing and wipe residual moisture off after each use.
How thick should salt tiles be for a sauna or spa wall? For decorative backlit accent walls, half-inch tiles usually work fine. For higher-traffic or structural walls, three-quarter-inch or thicker tiles hold up better over time.
What’s the difference between Himalayan salt tiles and salt wall panels? Tiles are individual flat pieces you set and grout yourself, giving you more design flexibility. Panels come pre-assembled on a backing board, which speeds up installation but offers less customization.
Can I install salt tiles myself without a contractor? Smaller accent walls are doable for someone comfortable with basic tiling work. Larger walls, especially with backlighting, are usually better handled by a contractor experienced with sauna or spa materials.
Do pink salt tiles actually offer health benefits? There isn’t strong, independent evidence supporting specific health claims for decorative salt walls. What they reliably provide is a distinctive look and warm ambiance, which is a legitimate reason to choose them on their own.