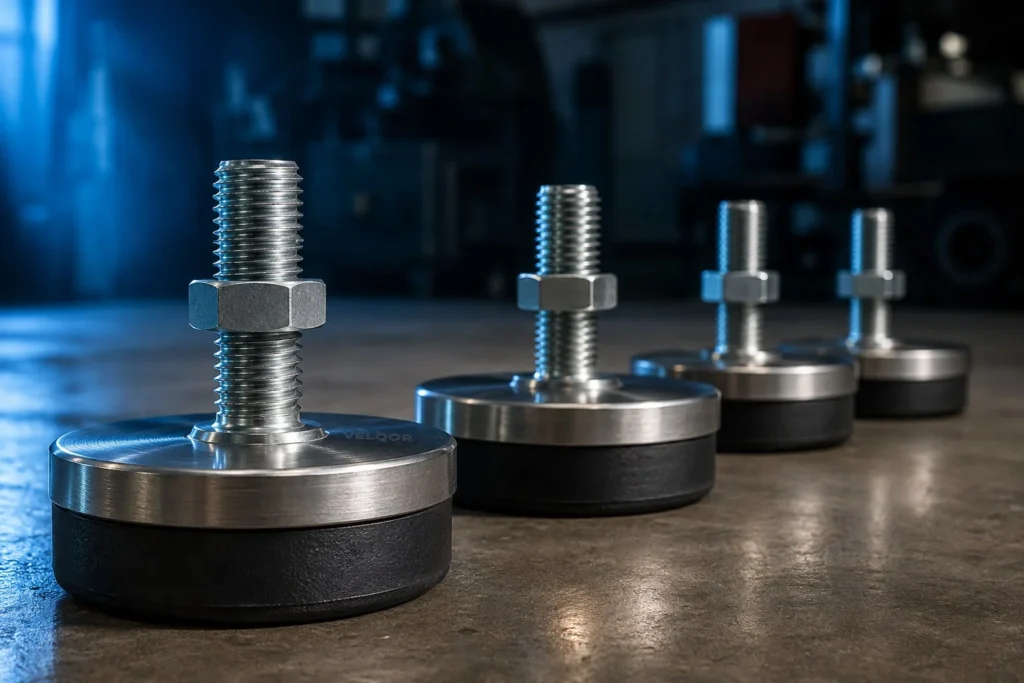
Vibration damping leveling feet help address these challenges by combining height adjustment with vibration isolation. They support equipment on uneven surfaces while reducing the transmission of mechanical vibration into surrounding structures. Choosing and installing the right feet requires more than matching a thread size; machine weight, operating speed, floor conditions, and environmental demands all influence performance.
How Vibration Damping Leveling Feet Work
Standard leveling feet provide an adjustable support point that allows equipment to sit level on a floor. Vibration damping models add a resilient element, often made from rubber, elastomer, or another engineered material, between the machine and its supporting surface. This element deforms slightly under load and absorbs some of the vibrational energy generated during operation.
When a motor, pump, compressor, or production machine operates, its rotating or reciprocating components create dynamic forces. Those forces can travel through the machine’s frame and into the floor, where they may spread to nearby equipment or occupied areas. A properly selected damping foot reduces the amount of vibration transmitted along this path.
The leveling mechanism serves a separate but equally important purpose. It compensates for minor floor irregularities and helps distribute the machine’s weight across its support points. Together, leveling and damping improve stability without requiring extensive modifications to the installation area.
However, these feet do not eliminate every source of noise. Airborne sound, worn bearings, unbalanced rotating components, and loose machine parts may require separate corrective measures.
Why Noise and Movement Reduction Matters
Excessive vibration can create several operational problems:
-
Equipment wear: Repeated vibration can accelerate loosening of fasteners and contribute to fatigue in connected components.
-
Reduced precision: Sensitive measuring instruments, cutting equipment, and inspection systems may produce inconsistent results when their supports vibrate.
-
Workplace noise: Vibration transferred into floors and structural members can increase noise in adjacent rooms.
-
Unstable operation: Poor leveling can cause rocking, uneven loading, or unwanted movement during startup and shutdown.
-
Maintenance interruptions: Persistent vibration may lead to repeated adjustments, inspections, and unplanned downtime.
For example, a small packaging machine installed beside a quality-control station might transmit vibration through a concrete floor. Suitable damping feet can help isolate the machine from the surrounding structure, although sensitive instruments may need dedicated isolation systems.
How to Select and Install the Right Leveling Feet
Effective vibration control starts with understanding the equipment rather than selecting a product based solely on its advertised damping capabilities.
Step 1: Calculate the Load at Each Support Point
Determine the machine’s operating weight, including motors, accessories, materials, and other components that remain attached during use. Divide that weight among the support points to estimate the load each foot must carry.
For example, a machine weighing 1,200 pounds and supported by four equally loaded feet would place approximately 300 pounds on each foot. In practice, the load may not be distributed evenly because of the machine’s center of gravity, frame geometry, or uneven flooring.
Select feet with an appropriate rated capacity and account for dynamic forces and the manufacturer’s recommended safety margins. Do not assume that four feet rated for the average calculated load will automatically provide adequate support.
Step 2: Identify the Vibration Characteristics
Different machines produce different vibration patterns. A high-speed spindle, a reciprocating compressor, and a low-speed industrial mixer do not necessarily require the same isolation characteristics.
Consider the operating speed, vibration frequency, amplitude, and whether the machine generates continuous or intermittent forces. Where vibration is significant, a technician can measure it using a vibration meter or accelerometer.
These measurements help determine whether damping feet are appropriate or whether the application needs a more specialized isolation system.
Step 3: Choose the Correct Damping Material
Rubber and elastomer compounds are common choices because they provide resilience and can reduce vibration transmission when correctly selected.
Material selection should account for load, temperature, oils, cleaning chemicals, moisture, and exposure to outdoor conditions. Some compounds resist oil and grease better than others, while certain materials perform more reliably in demanding temperature ranges.
The material must also operate within its intended compression range. An element that is too stiff may transmit substantial vibration, while one that is too soft may compress excessively and compromise stability.
Step 4: Check Thread Size, Height, and Base Design
Verify the mounting thread, available adjustment range, base diameter, and required clearance before ordering replacement feet. Confirm that the mounting points can accommodate the selected hardware without interfering with guards, cables, or nearby components.
A broad base may improve contact with suitable flooring, but its dimensions alone do not guarantee better vibration isolation. The complete design, including the damping element and load rating, determines suitability.
Step 5: Install and Level the Equipment
Follow the machine and leveling-foot manufacturers’ installation instructions. Support or lift the equipment using approved methods, secure each foot correctly, and adjust the height until the machine meets its leveling requirements.
Check that all feet remain in firm contact with the floor. A foot that is unloaded or barely touching the surface can allow rocking, while excessive adjustment may place uneven stress on the frame.
Once the machine is level, tighten any required locking hardware and verify that the installation remains stable.
Step 6: Test Performance Under Operating Conditions
Start the equipment and observe it during startup, normal operation, and shutdown. Check for rocking, unusual noise, visible movement, and changes in vibration.
If possible, compare vibration measurements taken before and after installation at consistent operating speeds and measurement locations. Record the results to establish a useful maintenance baseline.
Common Mistakes When Using Damping Leveling Feet
One frequent mistake is assuming that softer damping material always provides better isolation. In reality, isolation depends on the relationship between the isolator’s natural frequency and the machine’s excitation frequency. If operating frequencies approach the isolator’s natural frequency, vibration can increase rather than decrease.
Another problem is overlooking uneven loading. A machine with four support points may place most of its weight on three feet if the floor or frame is uneven. This can reduce stability and cause some damping elements to operate outside their intended range.
Other avoidable mistakes include:
-
Selecting feet based only on maximum load capacity without considering operating dynamics.
-
Installing damping feet on loose, cracked, or unsuitable flooring.
-
Using incompatible materials in environments exposed to oils, solvents, or extreme temperatures.
-
Expecting leveling feet to correct mechanical imbalance or damaged bearings.
-
Ignoring regular inspections after installation.
Damping feet are part of a vibration-control strategy, not a substitute for proper machine maintenance or structural assessment.
Practical Tips for Better Vibration Control
For the best results, establish a consistent inspection routine. Check for cracked or hardened damping material, corrosion, loose fasteners, uneven compression, and changes in machine alignment. Replace damaged components before they compromise stability.
Keep the equipment’s operating conditions in mind when evaluating performance. A machine that runs quietly without a load may behave differently when processing materials or reaching full speed. Test it under representative conditions rather than relying exclusively on an unloaded inspection.
Where several machines share a floor, consider how their operating frequencies and installation positions interact. Isolating one machine may reduce the vibration it transmits, but nearby equipment can still contribute to the overall problem.
Finally, investigate persistent vibration at its source. Imbalanced rotors, misaligned couplings, worn bearings, loose panels, and poorly secured pipes can all generate noise that leveling feet cannot resolve. Correcting these faults before installing isolation hardware often produces better results.
Conclusion
Vibration damping leveling feet offer a practical way to combine equipment leveling with reduced vibration transmission. Their effectiveness depends on proper load calculations, suitable damping materials, correct installation, and realistic performance testing. By addressing both the machine’s mechanical condition and its connection to the floor, facility managers can improve stability, reduce unwanted noise, and support more reliable equipment operation.