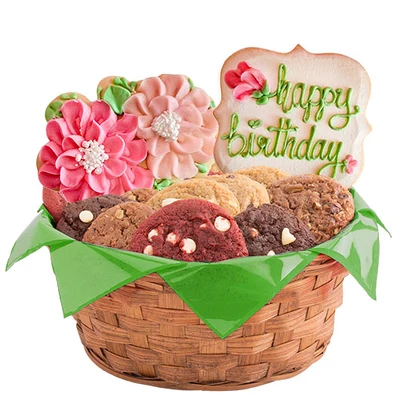
A birthday cookie table looks simple until you try to get clean lines, bright colors, and icing that actually dries. Good decorating is less about artistic talent and more about choosing the right base, the right icing, and a few repeatable techniques. If you want birthday sugar cookies that look neat and taste like you meant them to, start with these methods.
Understand Your Base Before You Decorate
Cookies by Design built its business on hand-decorated sugar cookies arranged as bouquets and gift baskets. The company bakes sugar cookie dough fresh at local shops and decorated with signature icing, which shows why structure matters. A cookie that holds its edge will hold your design.
Choose The Right Icing For The Job
Royal icing is the standard for detailed work. It starts thick for outlining, thins for flooding, and dries firm enough to stack or package. Buttercream stays soft and creamy, which is great for flavor and for piping rosettes, but it will not set hard.
Use royal for flooded backgrounds, fine lines, and layered details. Use buttercream when you want a soft bite and simple piped borders. Many bakers use both on the same set.
Prep Cookies For Smooth Results
Cool cookies completely. Brush off crumbs with a soft pastry brush. If the top is uneven, let the cookie rest overnight under a flat board with parchment. A flat surface gives you an even flood and prevents icing from pooling.
Simple Techniques That Make A Big Impact
You do not need twenty tools. Three or four techniques cover most birthday designs.
Outline And Flood For Clean Shapes
Pipe a border with stiff icing using a small round tip, then thin the same color to a 10- to 15-second consistency and fill inside. Use a scribe or toothpick to push icing to the edges and pop air bubbles. Let the base dry two to four hours before adding details on top.
This method works for numbers, balloons, and cake shapes. It keeps colors from bleeding and gives you that smooth bakery finish.
Add Texture With Sprinkles And Sanding Sugar
Apply sprinkles while the icing is wet if you want them embedded. For a crisp edge, flood first, let it crust for 20 minutes, then add a fresh line of icing where you want to sparkle and sprinkle only that area.
Nonpareils, jimmies, and sanding sugar each behave differently. Sanding sugar adds crunch and catches light. Jimmies hold color in the oven if you want to bake them in.
Use Stencils And Stamps For Consistent Patterns
Stencils save time on repeating birthday patterns like confetti, stars, or dots. Lay the stencil flat on dried icing, spread a thin layer of stiff royal over it with an offset spatula, and lift straight up.
Cookie stamps and embossers work best on slightly soft dough before baking or pressed gently into freshly flooded icing.
What Comes In A Cookie Decorating Kit
If you are hosting kids or want to skip mixing colors, a kit solves most prep. The Birthday Decorating Kit from Cookies by Design includes ten or twenty assorted star and birthday cake favor-size cookies, plus four icing colors. Cookies are baked fresh to order and come with decorating instructions and a tutorial video.
A typical cookie decorating kit from any source should include baked sugar cookies, two to four bags of colored royal icing, and a small packet of sprinkles. Better kits add piping tips, a scribe, and clear bags for gifting. Check that icing is in separate bags and labeled for outline versus flood.
Build A Birthday Theme With Color And Shape
Birthday cookies read as “birthday” because of color choices and shape mix, not because of complex art.
Pick A Limited Palette
Choose three main colors plus white. For a classic birthday set, that might be bright blue, cherry red, and sunflower yellow with white space. Mix a large batch of each shade so numbers and balloons match across the dozen.
Use gel food coloring. Liquid coloring thins icing and changes consistency. Add color a little at a time, then let it sit for ten minutes to deepen.
Match Decoration To Age And Party Style
For a first birthday, keep designs large and simple. Big number cookies, single-layer floods, and a few piped dots are easy to eat. For adults, add fine details like piped lettering, metallic luster dust, or a small message cookie with a name or short phrase.
Cut shapes that tell the story quickly. Stars, candles, and cake slices read as “birthday” from a distance. Keep size under three and a half inches for favors.
Common Mistakes To Avoid
Thin icing is the most common problem. It runs off the edge and loses detail. Keep outline icing stiff enough to hold a peak, and flood icing thick enough to coat the back of a spoon but still flow.
Do not decorate warm cookies. Heat melts buttercream and causes royal icing to crater. Let decorated cookies dry uncovered at room temperature for six to eight hours, longer in humid weather. Stack only after the top is hard to the touch.
Avoid overcrowding the table with every color you own. Too many competing shades make the set look busy. White space helps each cookie stand out.
In a Nutshell
The best birthday cookies come from a steady base, controlled icing, and a few practiced moves. Outline and flood, sprinkle with purpose, and keep your palette tight. Whether you bake from scratch or start with a cookie decorating kit, focus on consistency across the set rather than perfection on one cookie.
For a party activity that doubles as a favor, Cookies by Design offers ready-to-decorate birthday kits with fresh sugar cookies and colored icings, which lets you practice these techniques without sourcing everything separately. Finish with fully dried birthday sugar cookies that can be bagged, gifted, or arranged in a tray for the table.